Showing posts with label parenthood. Show all posts

Tuesday, December 9, 2014

Cheap and Easy Holiday Crafts

Here are three crafts simple enough for toddlers using materials you may already have around the house.  They are super fun and make minimal mess as there is no paint involved!

Here are the materials needed for each, the rest is obvious!


For the Santa:

paper plate, googly eyes, red construction paper cut in the shape of santa's hat, cotton balls, a red pompon for the nose, a brown marker to draw the mouth, white glue 

For the Snowman:

2 paper plates, googly eyes, blue construction paper cut in the shape of a hat (and scarf if you want), orange construction paper cut in the shape of a carrot nose, pompoms for buttons, pipe cleaners for twiggy arms, small circles for the mouth (we used the eyes that popped out of our gingerbread men but you could use a hole punch and some construction paper), a stapler and white glue 

For the Gingerbread Men:

foam gingerbread man shapes (or cut some from construction paper), Pom poms, glitter glue in squeeze tubes, border stickers or ribbon and glue 


Sunday, June 29, 2014

June favourites!

Here are my favourite things from the month of June!

Beauty:

My number one favourite new product this month is my Loreal Majic Nude Foundation.  I had been putting off buying it because it is quite expensive ($19-$20 Canadian) for a drugstore foundation, and I just didn't need a new one.  When London Drugs had all Loreal foundations for $11.99 I took advantage and picked this up.  I loved it instantly.  It is a very thin consistency so it blends out really quickly and easily, but it also provides a really good medium coverage that looks really natural.  It tranforms into a powder finish when it sets so it gives a really beautiful finish to the skin.  It gives the coverage of a liquid with the lightweight feel and look of a powder.  Perfect for spring and summer!  I only wish it had SPF protection (that would make it worth the almost $20 price tag!)

My other beauty favourites have all been lipsticks, so watch for a post all about my most loved and hated lip products soon!

Parenting:

This month I have to write about something that has been one of my favourite parenting, beauty, and food products for quite a while, but I use it so often and in so many different ways that I always forget about it!  This miracle multi-purpose product is Cold-pressed Extra Virgin Coconut Oil.  I get mine in a huge tub from costco which stays in my kitchen.  Then I scoop some of it into containers that I keep in my own room and in P's room.  I use this stuff numerous times a day.  I'll stick to its parenting purposes for today, but it also has so many health benefits when used in cooking or as a beauty product.  Google it people!!

P sucks her thumb as she falls asleep, so she often gets sores on her lips and thumbs from this habit.  I apply coconut oil to her lips and thumbs a few times a day and the sores clear right up.  This stuff is perfect because it doesn't matter  if she ends up ingesting it .  For that reason I cant use polysporin or anything like that as it is being applied to spots that will inevitably end up in her mouth.

Once I started using coconut oil for that specific purpose and seeing how well it worked, I started trying it for other things as well.  Low and behold, it works great on cuts and scrapes before you put on a band-aid because of its anti-bacterial and anti-fingal properties. It is great for bug bites for the same reason, and it even soothes and heals diaper rash!  It is perfect as an all-over moisturizer for dry skin (which D suffers from terrribly).

I also use it a ton in baking and cooking because of its health benefits, but I'll write more about that in a future post.  If you don't already have some of this miracle oil in your house, you should consider getting some as soon as possible.  I just keep on discovering its wonderful qualities and uses!  

Cooking and Food:


Cooking: This month I have been inspired by a tall stack of cookbooks that I picked up at my local library.  I love food reading, and I am always interested in cookbooks written by celebrity chefs or cookbooks all about a certain country I am interested in at any given time.  My local library has a ton of cookbooks, and I bet yours does too.  For free!!  Check it out if you're a frugal food lover like me.

Food: This month I stopped drinking coffee to see if it would help me feel better, since I had been ill.  It didn't :( but I did find that I started sleeping better and those terrible headaches I'd been getting went away (the ones that used to start a few hours after I forgot to drink my coffee...).  So, I didn't start up again.  Instead I started making a cup of herbal tea in the morning, and my favourite is the Presidents Choice brand Chocolatey Chai herbal tea.  It smells so good, and with a little splash of milk it satisfies my craving for something hot in the morning.  Also satisfies my craving for something dessert-ish in the evening. Ok, the stuff is delicious any time of day. Its cheap too. Bonus!


Random Stuff:

I have, of course, been watching TV and reading books this month.  I have not, unfortunately, come across anything so wonderful that I feel the need to recommend it here today.  If I'm gonna call it a favourite, it has to be pretty great. 


Thursday, June 26, 2014

Frugal Friday: Quick and Easy Frozen Snacks

Here are some of my favourite things to make and have ready in the freezer for P and D all summer long.  They are quick and easy, cool and refreshing, and most importantly: super healthy! If you don't already own a Popsicle Mould, then you need to get one! It is one of my most used summer items, and my kids LOVE all sorts of healthy creations I freeze in them.  You could also use shot glasses and Popsicle sticks in a pinch.  Alternatively, the banana coconut lollipops need nothing but a few coffee stir sticks.

Banana Blueberry Yogurt Pops:  

I make these often because The ingredients are staples that I always have in my house. 

In a large bowl, mash one ripe banana.  Stir in one cup of plain yogurt (you can use flavoured yogurt, but then don't use the honey), one heaped spoonful of almond butter, one tablespoon of honey. Stir vigorously until smooth, then fold in a handful of fresh or frozen blueberries.  Spoon into Popsicle moulds, add the sticks and pop into the freezer for at least 3 hours.  Run the mould under hot water for a few seconds to loosen the pops and make them easy to remove from the mould.

Mango Lime Fruit Pops:  

I make these when cases of mangoes go on sale.  In order to use them all while they are still delicious, I have had to get creative!

Peel 2 ripe mangoes and remove the pits.  Place the flesh of the mangoes into a blender with the zest and juice of one lime and a few leaves of mint.  Taste and add a little honey if you want, though it's not really necessary if you're using good mangoes.  Pour the purée into Popsicle moulds and freeze for at least 3 hours.  Run the mould under hot water for a few seconds to loosen the pops and make them easy to remove from the mould.

Banana Coconut Lollipops:  

These are just so easy and again, I always have all of the ingredients on hand.  P and D literally cannot get enough of these!

Slice 1-2 bananas into thick-ish rounds (about 1.5 cm).  Stick each slice with a coffee stir stick through the rounded (uncut) side.  Place on a sheet of parchement paper on a pan, then place in the freezer for at least 2 hours.  Fill two small, shallow dishes: one with plain or flavoured yogurt, and one with unsweetened desiccated shredded coconut.  Remove the frozen banana sticks from the freezer and dip both sides into the yogurt, then quickly into the coconut.  Eat immediately, or place back on the pan and into the freezer until you're ready to serve them.  

Bonus tip: these lollipops can be made using infinite substitutions or combinations.  Try substituting melted peanut butter or (for a real treat) Nutella for the yogurt.  The coconut can be replaced with chopped peanuts, almonds or any nut, or crunchy cereal.  Use whatever you have on hand that your kids love!


Wednesday, June 25, 2014

Review: Cypress Hills Provincial Park, Saskatchewan

This past weekend I had the pleasure of travelling with my family (including my parents) to Cypress Hills Provincial Park.  We enjoyed ourselves so much that I just had to write a review and include some of the highlights!

We camped in the Warlodge campground and it was beautiful.  The bathrooms were clean and the shower facilities were immaculate and had plenty of warm water. It was wonderful to literally share the space with abundant wildlife.  We saw many deer and a few moose sightings as well, including a mother moose wandering through our campsite with her baby not far behind! The park was perfect because there were plenty of places to grab ice cream, a quick lunch, or any supplies you might need.

This mother moose had to literally step around our clothesline to walk through our campsite!


The beach was small but sandy and the water seemed to have a sandy bottom as well.  We didn't go in the water, having seen quite a lot of algae around the small lake.  We spent one morning at the pool which was perfect for children of any age.  There was a large splash pool that was perfect for P and D (two years old) as they could play safely while we watched from the pool chairs.  There was also a large pool with many different depths that would be fun and safe for any other age child.  We were lucky enough to have free swim days, and lifeguards were still present.

We also visited a few of the local attractions.  We all went to Fort Walsh for a morning tour and picnic lunch. The drive was quite long from the campground (1 hour) but very scenic, with breathtaking views and more chances for wildlife sightings. We all enjoyed the Fort, though we did not follow the guided tour.  Instead we followed the whim of our toddlers who were fascinated by all of the old buildings filled with furs, old tools and antique furniture.  They also loved checking out the old wagons and eating fresh baked cookies straight from the wood oven.  The fort was staffed by locals recreating characters typical of the period in which Fort Walsh was thriving.  They were helpful and passionate about the stories they told.  They were also extremely knowledgeable about the local environment and the local history.  We enjoyed our picnic in the Visitor Center cafeteria because it was raining, but despite the patchy weather, we enjoyed our visit very much.

The wagon at Fort Walsh


Suneil and I visited the Zip Line park in the park core.  We did the canopy tour for $75 which is advertised as a 2 hour tour, but only took one hour.  We suspect this is because we  were in a group of 4 rather than the 8 person maximum.  We prefered the smaller group and found the tour to be a good value nonetheless. We felt very safe and enjoyed the staff and the views, as well as the thrill!  It was a great activity for an afternoon and we got a little exercise as well (though it is by no means necessary to be extremely fit to participate).  We enjoyed it so much that we took P and D back later that day to check out the baby zip lines, which were lines low to the ground where they placed swings that the kids could ride along.  They loved it.

We had a fantastic weekend and would definitely recommend this park, as well as any of the sites and activities we visited while there.


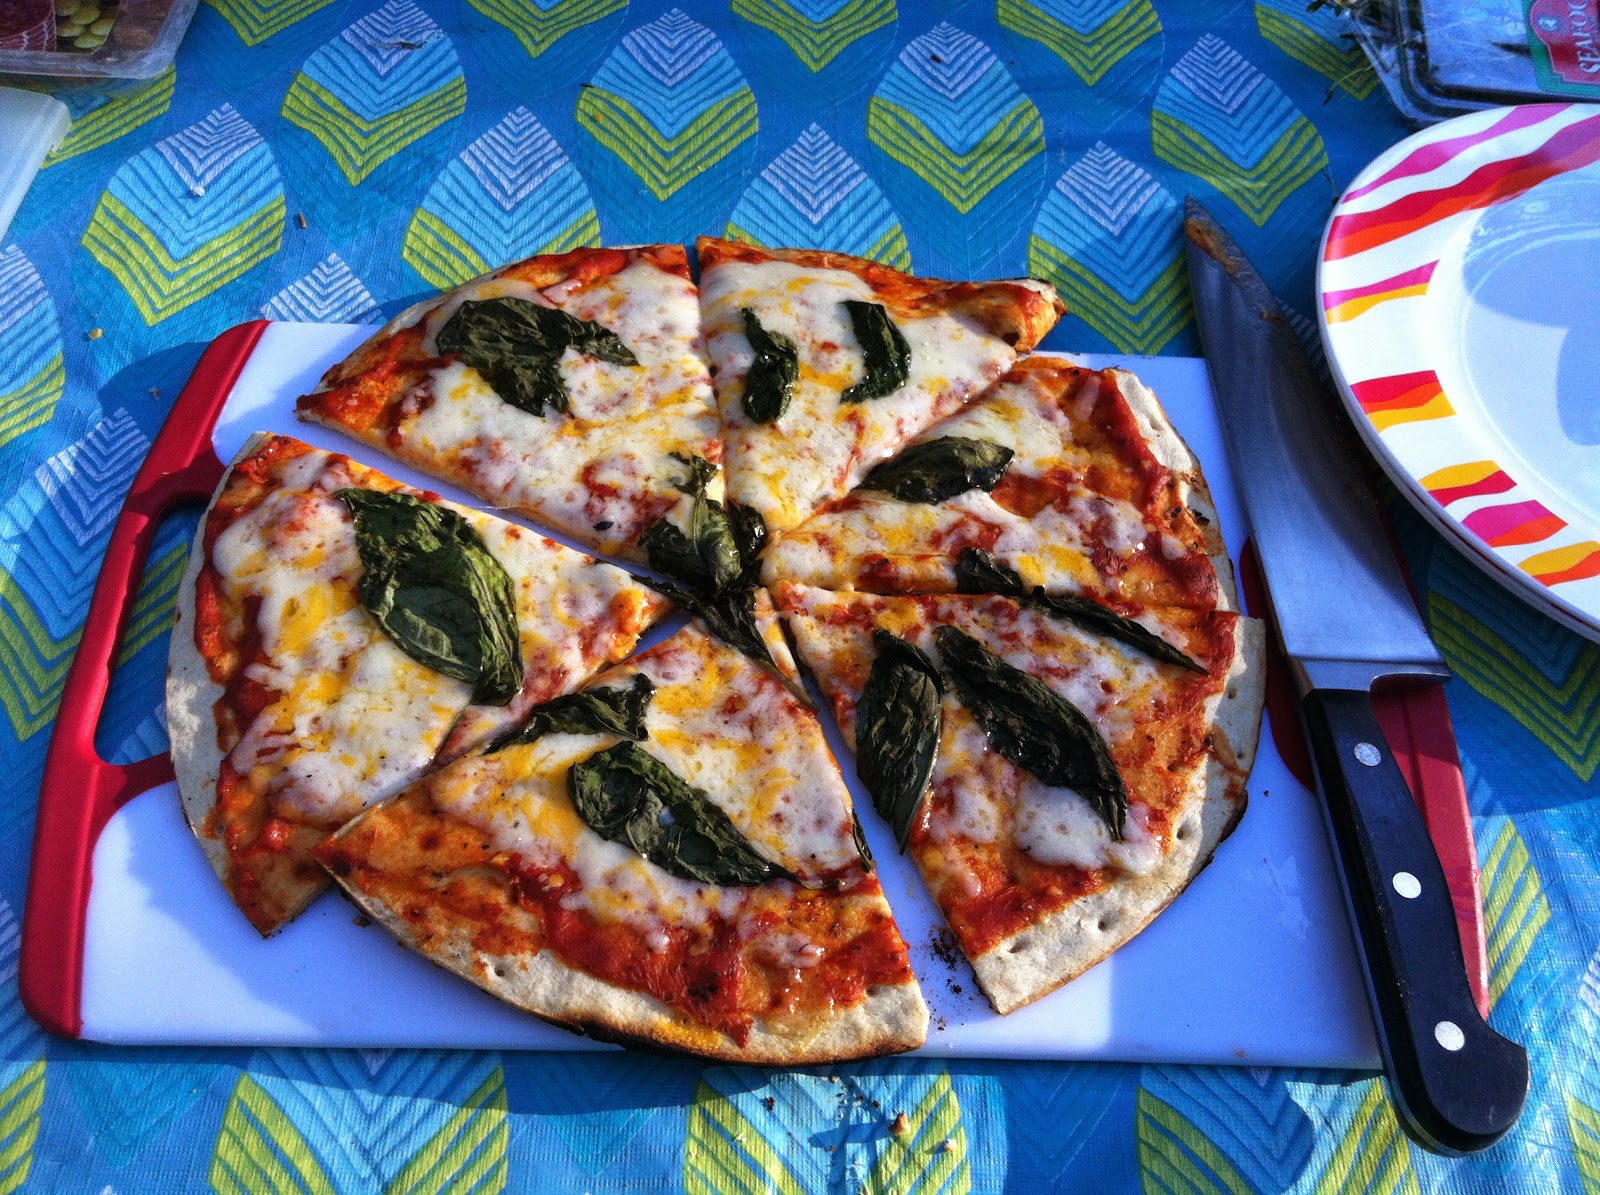
Check out the pizza oven Suneil and Dad built!

A simple pre-cooked crust with sauce, grated cheese and fresh basil.  Yum!


Sunday, June 15, 2014

Happy Fathers Day!: The Toddler Tag


 As soon as I saw this video tag on Youtube I knew I wanted to do it with P and D.  Its so cute! And what a perfect way to make a record of what they are like as two year olds!  I have been wanting to film it for a long time and with Father's Day coming up soon it seemed like a fun way to record just what P and D are like on Suneil's third fathers day.  Now we will have a record of all their likes and dislikes, and a video of them in all their soggy diaper, dirty t-shirt, messy ponytail, incomprehenisible response toddler glory. Please enjoy this completely unedited, unrehearsed video.  We had a blast making it for all the great dad's in  our lives.  Happy Fathers Day Suneil(Wizardad), Grandpa and Babaji!!

Click on the link below to watch our video!
Happy Fathers Day Toddler Tag


Thursday, May 29, 2014

Frugal Friday: 3 Breakfasts with Oats

What is cheaper and healthier than oats? Nothing!! Oats are so nutritious and delicious and these three recipes are simple and budget friendly.  Click on the recipe title to find out more and Enjoy!

Creamy Cinnamon Porridge with Hemp, Sunflower and Pumpkin Seeds
This recipe has been tested until perfect by my father-in-law, Harry.  P and D devour it every chance they get and I love having a big batch ready in the fridge for weekday mornings when we are in a rush but need something filling and packed with health benefits.

Homemade Healthy Granola
This is my somewhat famous recipe for granola.  It is perfect sprinkled over some Homemade Yogurt, or even with some milk poured over top.  Some of the ingredients are not the cheapest, but I buy them in bulk to save money, and I have provided cheaper (though less nutritious) options in the recipe.

Whole wheat and Oat Pancakes with Caramelized Bananas
This recipe is a family treasure.  The technique for studding the pancakes with golden caramelized bananas comes from my sister.  My dad's pancake recipe has been health-ified with whole grains and healthy fat. Top these with fresh fruit, creamy yogurt and maple syrup and they are to die for.

Thursday, May 22, 2014

Frugal Friday: Weekend Away

As our twins get older we begin to imagine ways to get away as a family without spending too much money.  For the first few years of their lives we stuck pretty close to home. We really only ventured out to fairly predictable locations and we usually took a ton of gear with us.  Now that they are growing up and are able to tolerate more of a break from their routine we want a family vacation that is super fun, educational and affordable.

Suneil and I both have fond childhood memories of camping and road-trips with our parents and siblings and we really wanted to recreate some of those memories with our own children.   Recently we invested in a camper-trailer to make camping a more convenient experience for us all.  When P and D turned two, our opportunity to fly with them for free was over, and since one set of their grandparents live in British Columbia the camper was seemed like a particularly good investment for us as we plan to drive out to BC once a year or so.  We have big dreams to take our minivan and camper all over North America with the kids, but this past weekend we took it out for the first time.

We had originally planned on using it for the first time one week later, but we just couldn't wait. For me, one of the biggest draws of a trailer like this was that once we had it all set up and stocked with all the necessities, we would be able to go away for a weekend with little more than a quickly packed suitcase and a few groceries.  This turned out to be exactly the case.  When I called Suneil at work with the idea that we should forego yard work and go camping for the weekend instead, he thought it was a great idea.  twenty-four hours later we were on the road with everything we needed!

We chose a provincial park about 1.5 hours away from home and the weekend cost us under $150.  That includes the camp fees, part of our season pass for the parks, and fuel for the van.  I didn't count groceries because we would have needed those anyway.

As you know, I am pretty particular about what my kids eat.  I avoid preservatives, artificial flavourings, excessive or unnatural sugars and colouring in their foods.  However going camping is a whole other situation.  Certain long-standing family traditions (from Suneil and I's childhoods) needed to be maintained.  Camp foods, for us, include hot dogs, marshmallows, smores, potato chips, and even fruit loops!  Some of these things went over better than others.  Buns were discarded and hot dogs devoured almost whole, but to my surprise they would not finish their fruit loops.  I guess some things really are just too sweet (not for me though! I can still down a bowl of fruit loops once in a while!).

Aside from a few minor issues, the weekend was a great success.  The first time hitching the trailer to the van was not 100% successful but after a few pull-overs to make adjustments and then a few more out of sheer paranoia we were finally on our way and made it to the campground without a hitch (well, figuratively if not literally haha).  By the end of the weekend we were all pretty exhausted but very happy with how it all turned out.  The kids had a blast playing in the dirt, exploring in the brush to find rocks and plants, and seeing wild animals including some crows who had built a nest in our campsite, a pheasant who liked to sleep in a tree beside our camper, and even a few garter snakes!

Our goal of beginning to create happy childhood memories of fun and adventurous family vacations has been reached, and we will continue to gather more and more this summer and in the years to come.

Here are a few fun pictures from our weekend!
Snuggling by the campfire

Mmmmm ... hotdogs

Their first s'mores ... finger licking good!


Tuesday, May 6, 2014

April favourites

Here are my favourite things from the month of April!

Beauty:

Nails: I have really been enjoying my Milani nail lacquer.  It claims to be a high speed, fast dry, one coat formula. These really are a very fast drying formula and one coat usually does the trick, which I love because I usually want to be able to do my nails in 15 minutes or less. I don't use a topcoat (takes too long!) but I usually get a at least a few days out of a manicure with this stuff even though I am cooking, cleaning and gardening a lot. The colour selection is bright, vibrant and perfect for spring and summer. I have the colours Pink Express and Jiffy Orange.
Makeup:  My hands down favourite makeup purchase this month is from Tarte Cosmetics. The Brow Architect is a brow shaper, liner and definer.  One end is a brow pencil, but instead of coming to a point, it comes to a flat tip, much like the shape of the tip of a pair of tweezers.  The other end has a spoolie, and then in the middle is a neat little compartment that contains a concealer/highlighter with a sponge applicator tip.  I use this product along with my NYX brow powder, and my brows have never looked better or more natural.  I have the colour Fair.

Hair: I was hooked in by the bright orange packaging on the Herbal Essences Body Envy dry shampoo, and it's also one third the price of my old favourite, Batiste brand.  I like the Herbal Essences one for a day when I am wearing my hair half up or in a ponytail, because it it gives me great texture and volume. I can pull my hair back and pin it or tie it and it always has a perfect bump of volume on top and smoothes out easily.  I also like that it soaks up all the oil but it doesn't turn my hair white (at least, not once I rub it in), and it gives me quite a bit of hold as well.  For a non-washing day when I want to wear my hair down and have it feel really clean and soft, I will still use my Batiste because the herbal essences one leaves my hair quite stiff.


Parenting:

Colgate children's electric toothbrushes: So about a year ago the public health nurse suggested I try electric toothbrushes for P and D.  And then she gave me some free toothbrushes.  Being the frugal Saskatchemom that I am, I did not run out and pay money for more toothbrushes.  It took me until this month to finally check out the options in children's electric toothbrushes, and to my surprise there were a ton! I choose a few that came with stickers for decorating and P and D were hooked as soon as they heard that word "stickers".  They love using these toothbrushes, and now it is them who remind us it's time for teeth cleaning! It also makes the job quicker and much less work for us.

Food:

Youtube: I have been loving youtube channel Food Wishes this month.  Host Chef Jon Inspires me to try and make things I would never imagine I could do at home (like baguette at Easter, or pita bread! Who knew such things were possible for a simple home cook!?! ... he did I guess).  His videos lay out complicated recipes into simple to follow instructions, with every detail outlined so that if you follow his guide, the recipe is pretty much foolproof.  I love this guy and he really cracks me up too.
Snack:  At costco a few weeks ago I picked up a box of Calbee Snap Pea Crisps.  While I was reading the label and being pretty impressed with the common list of ingredients and acceptable-to-me nutritious value, a random woman told me I had to try them because they are delicious.  So I did, and they are.  P and D like them too.


Random Stuff:

Television:  Suneil and I have really been enjoying Big Brother Canada.  I am rooting for Neda by the way!  but our true addiction this month has been BBC's Downton Abbey, a period drama about a wealthy family adapting through troubled and changing times.  We got our hands on all four seasons, and two weeks later we had watched it all.  I know it's crazy.  How can the busy parents of two year old twins possibly find the time to watch quite so much TV???  I promise our children were not neglected, but I did neglect all of my other favourite pastimes in favour of watching this show.  It has the ability to make me laugh out loud and sob uncontrollably, sometimes in the same episode!

Books:  I am somewhat ashamed to admit that due to my insatiable addiction to Downton Abbey, I have read only a portion of just one book this month. I am just halfway through Markus Zusak's The Book Thief and I am really enjoying the story about a young girl growing up in Nazi Germany.  Sounds like it's been done before, but the story is very original, written from the point of view of the Grimm reaper.  A definite page turner, even after you've just finished an emotionally exhausting marathon (of television watching).

People: This month my favourite people are a little more personal for me.  A few weeks ago something shocking and terrifying happened to one of my siblings.  With my parents out if the country, it was up to myself and my other siblings to deal with everything that needed to be done and to support each other emotionally with the usual leaders of our family absent.  My fave people this month are my in-laws, who seemed to save the day over and over.  My sister-in-law was a rock, providing moral support, much needed information, a listening ear and babysitting whenever she was needed.  My (future) brother in law silently took care of all the tasks that no one else had the time or motivation to do.  So many times I remembered something I should get done, only to find he had already taken care of it.  My husbands parents arrived early this week and provided all kinds of support, providing a less chaotic and much more upbeat environment for P and D, supporting everyone in my family with heartfelt concern, and helping out with daily tasks wherever they were able.  These people are all so very dear to me and I had to give them props this month.

Hope you enjoyed this random list of goodies!  Happy May!


Thursday, May 1, 2014

Frugal Friday: Making Yogurt

My family eats a TON of yogurt, and making it myself saves me money.  I learned the technique from my mother and father in law.  It takes a bit of practise and a bit of time but it is not labour intensive.  You need just 3 ingredients, a few key kitchen tools and some patience. Here I will outline the steps and directions for making your own yogurt, as well as a few big mistakes to avoid. We like Greek style yogurt, which is much more expensive than milk.  But since I can turn a lot of milk into yogurt using just a bit of supermarket yogurt, it is very economical to make it myself.  It is also extremely delicious!

What you will need:

Ingredients:


  • Fresh milk : I use whole milk but any milk will work: 2%, 1% or skim.  The amount of yogurt you want determines the amount of milk you use.  I make 4 litres at a time because it keeps in the fridge for a few weeks, but you could make as little or as much as you like.
  • Powdered Milk: 1/2 cup per litre (4 cups) of milk
  • Plain (unflavoured and unsweetened) yogurt: a heaping tablespoon full per litre of milk.  This is what is called your starter.  When your milk is at the correct temperature, the bacteria from the existing yogurt spreads and turns all of it into yogurt! I use the Kirkland brand 0% plain Greek yogurt from Costco.  If you can't get your hands on this then you will have to test different brands to find one you really like.  I suggest finding one that has no gelatin or guar gum.  Look for a list of ingredients that includes only milk and bacterial cultures, nothing else.  The flavour and texture of your yogurt will mimic the starter, so choose a yogurt with a consistency and level of acidity that you like.  Once you make your yogurt, then you can save a bit and use it as a starter for the next batch.  I usually buy a fresh starter every second time I make it.  

Tools:

  • a heavy saucepan or dutch oven
  • a whisk
  • a thermometer
  • a wire/mesh strainer
  • a small insulated cooler lined with a thick towel (like a bath towel)

Directions:

  1. Remove the yogurt starter from the fridge.  It needs to be at room temperature when you stir it into the warm milk.  Stirring it in while it is cold could ruin your yogurt.
  2. In a large heavy bottom saucepan or dutch oven, combine the milk and the powdered milk, stirring with a whisk until the powder dissolves.  I use powdered milk for two reasons.  The first is that I like to enrich my yogurt for my children.  Adding powdered milk increases the amount of calcium, vitamin D and protein in my yogurt.  It also helps to create a rich, thick and creamy consistency.  When I use this method, my yogurt always sets perfectly and tastes delicious. Since our favourite is Greek yogurt, this method gives my homemade yogurt that same thick and creamy texture. 
  3.  Heat the milk over medium heat.  The time this takes will depend how much milk you are heating, but there are a few signs to watch for so that you will know when it is ready.  You do not want the milk to boil, just come to the point where it is about to simmer.  The milk will begin to get frothy when it is almost ready.  I use a large spoon to push the foam out of the way (no need to remove it) and watch for tiny bubbles raising to the top of the pan.  Once you see those bubbles, the milk is warm enough. I don't use my thermometer for this step, but if you choose to use it, the temperature you are aiming for is 198-200 F.  If your milk does come to a boil, it is not the end of the world.  It will just take longer to cool down to the right temperature, and it may make a huge mess on your stove.  Keep your eye on it!  

  4. Remove the milk from the stove and set it aside to cool.  Again, the time this takes will depend on the volume of milk.  This is where your thermometer comes in.  You are aiming for 45-55 C, or 115-125 F. I usually check it every 10 minutes until it gets close to the right temperature, then every five minutes.  If I am distracted or trying to do a few things at once, I set my timer so I will not forget and come back to find cold milk and have to start again.
  5. Stir in the yogurt starter.  Once the milk comes to temperature, use a whisk to stir in the ROOM TEMPERATURE yogurt.  Find some lidded containers for your yogurt.  Make sure that they will fit inside of your cooler.
  6. Strain the yogurt and leave it to set.  I like to place the containers in my sink to avoid a mess.  Place the sieve on top of the container and pour the yogurt through the sieve and into the container.  Put the lids on the containers and place them into the cooler.  Tuck the towel all around them and then close the cooler and set it somewhere that it will not be disturbed.  Set a timer for 8 hours and walk away!  Try not to move the cooler for at least a few hours after you close it, and don't open it until the eight hours are up.  The yogurt needs to stay at that same warm temperature in order for the bacterial cultures to grow and set the yogurt.  I don't like my yogurt too tangy, but if you do like tangy yogurt, you can let it set for up to 12 hours.  I have even forgotten to set a timer and realized after 16 hours that my yogurt was still waiting.  It still worked out fine.  The longer you leave it, the thicker and tangier it will become.  
  7. Place yogurt in the fridge.  Once your yogurt is as thick and tangy as you want it, place it in the fridge to cool overnight.  Once it is cold, enjoy it however you like!  Our favourite way is drizzled with maple syrup and sprinkled with hemp seeds.  Breakfast of champions!! (Or at least future champions ... of something that is yet to be determined)


Sunday, April 20, 2014

Best Easter Ever!

What a fun and wonderful day it has been for my family.  The Easter Bunny visited our home this year for the first time, and P and D were thrilled.  He had made a path of chocolate eggs from their rooms all the way down the stairs toward their Easter baskets and hidden eggs.  P kept exclaiming "What a mess! Me and Darshy clean it up." and then piling eggs into her basket happily.  They both had a blast searching for eggs and squealed in delight each time they found a new hiding spot.  Easter took on a whole new fun meaning for Suneil and I this year.
Even better was the fact that we had so much family spend the day with us.  With my parents away we thought it would be just us four this year, but at the last minute my two brothers and my sister-in-law managed to get the day off/travel here and spend the whole day with us.  We had an amazing family time eating great food, playing board games (a family tradition for us) and enjoying the great weather.

Here were a few of the highlights:

Natural Egg Dyes


I wasn't going to dye eggs this year as I thought P and D were a little young to really enjoy it, but when I saw the video about natural dyes on HGTV handmade youtube channel (natural egg dyes), I was inspired to try it myself.  Since I had all of the things I needed in my home already, I decided to give it a try.  To my surprise, P was very interested and the whole process turned out to be a great teachable moment (as we refer to them in my profession, haha) on colours.  Since the eggs need to sit in the dye for several hours, I spent a lot of time for the rest of the day lifting her up to check on them every fifteen minutes and nodding yes as she repeatedly exclaimed "we make the eggs colours so they be pretty!".  I made 4 dyes.  I followed the video instructions for the yellow dye (carrots and turneric), blue dye (red cabbage) and purple dye (blueberries).  Then I found some (embarrassingly quite nasty and inedible) radishes in my fridge and thought "Hey, I wonder if I could make a pink colour with these".  So I followed the basic recipe and process using the radishes and was delighted with the result.  You can't have Easter Eggs without pink!! The whole process of boiling the eggs and making the dyes took me about an hour, and then the eggs sat in the dyes for the rest of the day.  The following day we decorated very simply with stickers and bands from a decorating kit, and here is the end result.


Egg Salad Sandwiches


Since I had no intention of wasting 8 perfectly good Omega-3 eggs, we had egg salad sandwiches for lunch.
Suneil called them the most homemade Egg Salad sandwiches ever because I had to make homemade mayonnaise (I discovered I was all out when I went to the fridge) and I made homemade baguette bread to serve it on.
Check out the recipe for  No Knead Bread

Easter Dinner


We had a delicious meal of stuffed pork loin roast, lemon roast potatoes, and roast carrots and parsnips.  Dessert was abundant chocolate eggs and bunnies.  Check out the recipes!
Happy Easter!!!


Sunday, April 6, 2014

Easy Easter Craft for Toddlers: Egg Collage

This is a super fun and cute craft, we had a blast making it as a family this weekend!


What you'll need:
scissors
glue sticks
8 x 8 inch square of card stock in any colour
scraps of patterned paper in coordinating colours
ribbons, stickers, glitter glue, and other decorations of your choice (basically, whatever you have lying around the house)

Steps:
1. Prepare all of your materials.  First draw an egg shape on a sheet of card stock. Make it as large as you can fit on the card stock.  Then cut your scraps of paper into small pieces, about 1.5 square inches (but they don't need to be exact, uniform, or even square!). Cut enough to cover the entire square of card stock.  We each made one egg (four in total) so I made piles of coordinating paper - so that we would have one egg that was covered in different shades of pink paper, one in yellow/orange, one in blue and one in green.

2.  Place the side of the card stock with the egg drawn on it down against the table.  Help your child to apply glue to the back of the pieces of patterned paper and apply it to the card stock, covering the entire sheet and overlapping the paper when necessary.

3. Once the square is covered entirely, flip it over and cut out the egg shape so that you are left with an egg that is covered in a paper collage.

4.  Apply any decorations you like, but try to use strongly contrasting colours to the patterned paper.  For example, if your egg is covered in pink papers, use blue and green decorations.  Or if your egg is covered in pastel paper, use decorations in saturated colours.

And that's it, you have a beautiful homemade Easter decoration that you and your child can be proud to display in your home.  We always hang our seasonal crafting decorations in the window of our dining area.

Friday, April 4, 2014

March Favourites!!

Here are my favourite things from the month of March!

Beauty:

Lips: NYX butter gloss
These glosses are so creamy and comfortable and not at all sticky. They have just enough pigmentation to be worn on their own, and they look casual and easy with just enough colour.  Here are the colours I have:
Peach cobbler: a very wearable peachy orange, perfect for the springy orange lip trend
Vanilla Cream Pie: a rosy pink shade that is super feminine and perfect for a "no makeup" makeup day
Tiramisu: The perfect nude.  I love to wear this when I'm wearing a colourful eye look and want to keep the rest of my face neutral.
I get these from London Drugs because they so often have great sales on their NYX products.  Target also has some NYX products.

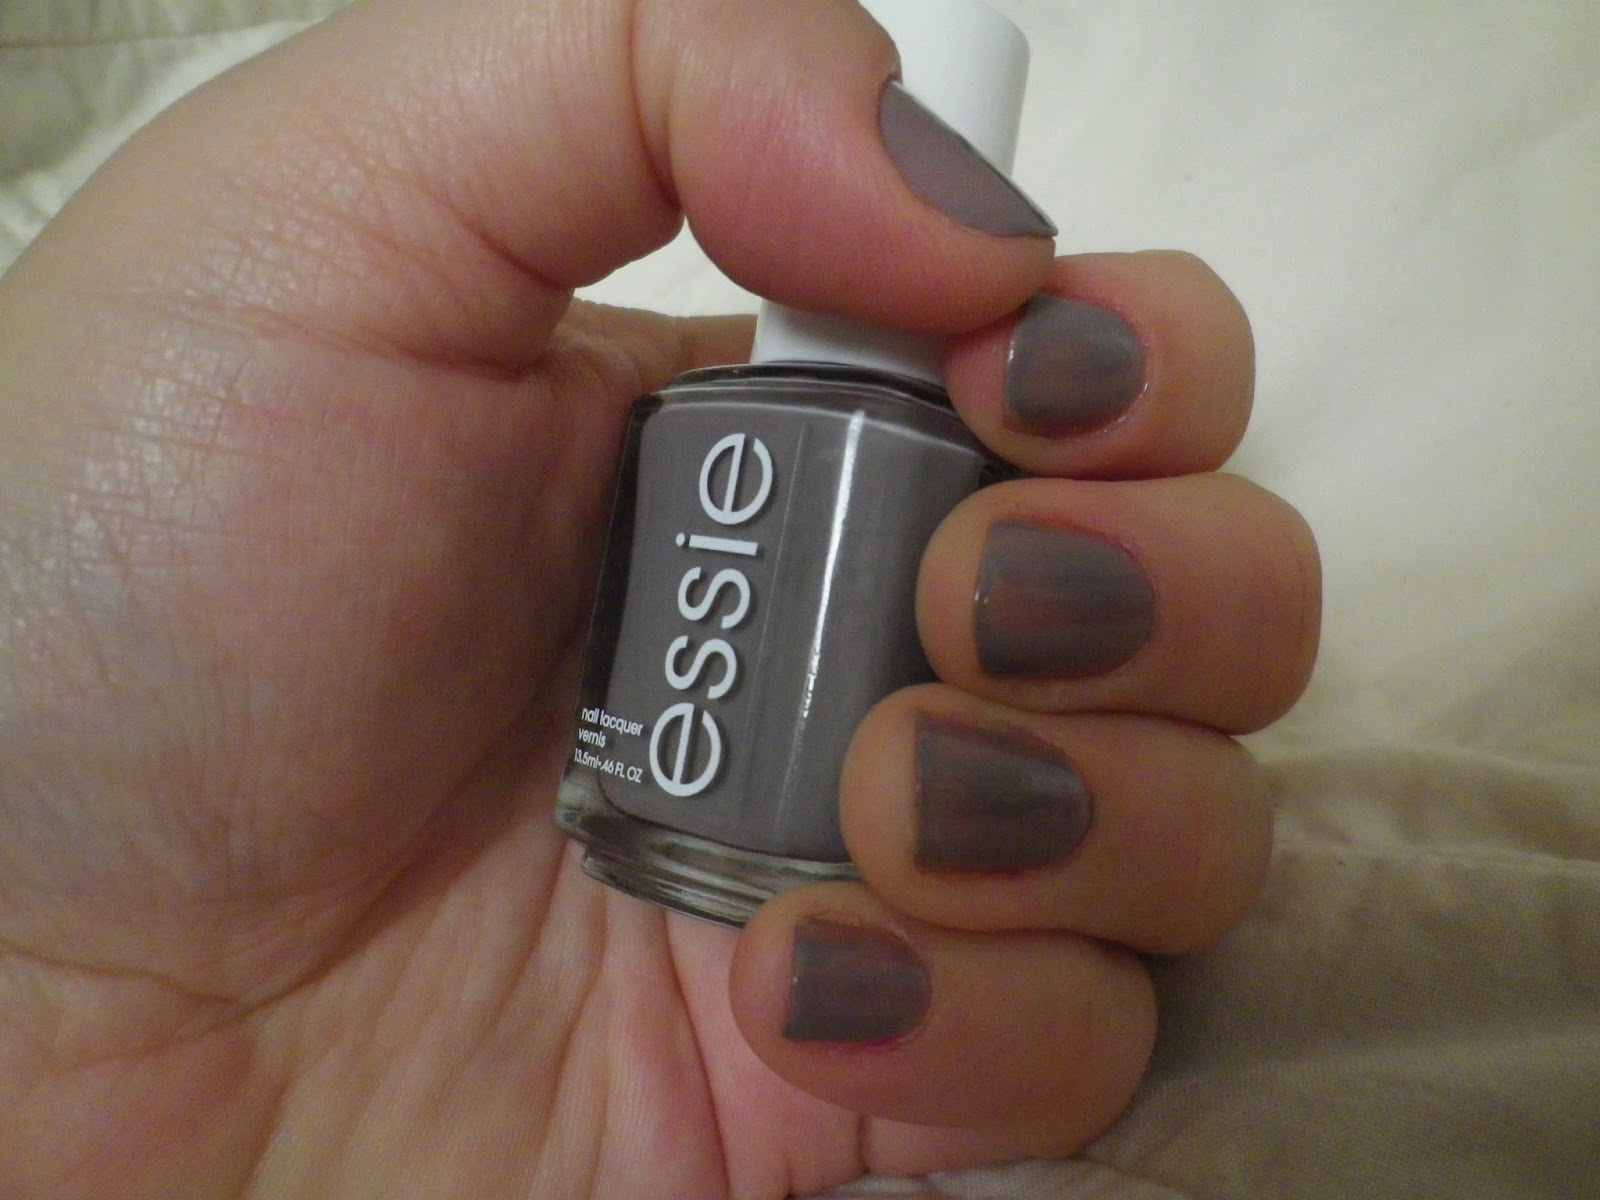
Nails: Essie nail lacquer  in chinchilly
I have been wearing this a ton on my fingernails.  It is the perfect grey shade, goes with everything.

Skincare:  Tarte's marajuca C-brightener eye cream
This is a total splurge for me, but so worth it.  I got a sample in a gift set I received for Christmas and it just ran out.  I could not help ordering a full sized one from the Tarte website.  Since I started using this stuff about 2 months ago, I have noticed a huge difference in my undereye area.  My fine lines have been noticeably reduced and I use far less concealer because this stuff has actually helped fade away my dark circles.  It is pricey but you barely have to use any (my 0.08 ounce sample lasted two months, even using it daily) This stuff is literally so amazing.  If you sign up on their website for their email notifications, you will get a coupon code for 20% off.  Free shipping in Canada after $75 and watch for deals too, cuz I got a free lipstick as a promotion with my order.  


Parenting:

Stickers :  P and D are really into stickers right now, and I have been using them a ton this month to keep them entertained with a quick and creative activity.  My smartest moment was when I threw a few sheets of stickers into my bag on our way out for a restaurant dinner one evening.  While just plain crayons would have kept them busy for a mere ten minutes before they started trying to eat them, the stickers added that extra interest! They stuck them all over their paper place mats, then moved them around and stuck them on themselves and on me and Suneil.  This entertained them the entire time we were waiting for our food (25 minutes or so).
Tip: To ensure this play activity is 100% independent, remove the part of the sheet that frames all of the actual stickers. This makes it much easier for toddlers to get at the stickers on their own without help.

Summer Infant video baby monitor:  We have had this monitor since the twins were born and have always found it had great value to us.  We could check on the kids at any time of night through the camera, and sooth an upset child from the comfort of our own bed simply by speaking to them through the monitor and watching to make sure they were soothed and falling back asleep.  Never has it given us more peace of mind though, as it has this month when we changed P and D's cribs into toddler beds.  We went into D's room one afternoon to find that during his "nap" he had made a pile on his new bed of all of the items from his entire closet and everything out of all of the drawers of his dresser (including the top ones ... how did he get up that high?? ... moment of panic!!).  We immediately moved the camera from P's room into D's room so that we could watch him and be sure he was safe and not performing impossible feats of baby climbing. We were also able to intervene a few times with what Suneil refers to as "the voice of God" (really just one of us, lol) saying "No Darshan, get back in bed".  He stopped with his reorganizing antics after a few days.  What a relief

Tresemme Split Remedy leave-in conditioning spray:  This stuff has transformed stresssful evening battles into relaxed evening routine.  P's hair is getting so long and it is so difficult to comb through after her bath.  She also wakes up every morning with a tangled rat's nest on the back of her head from moving around on her pillow.  I use a few sprays of this stuff on her wet hair after her bath and the comb just runs through her hair without problem.  I also use it on her dry hair in the mornings.  I spray a few sprays directly onto the problem (rat's nest!) area, and it makes brushing it our much less painful for both of us.  
I use this stuff in my own hair too and it really helps with frizz without making my hair greasy.  LOVE!


Cooking:

I have been loving my new cookbook, Jamie Oliver's Save with Jamie.  It is packed with recipes that use super cheap ingredients, but they are so delicious, and still simple enough to make quickly on a weeknight.  My favourite thing about this book is that it has a ton of vegetarian recipes, and so far my family has loved everything we've tried.  I love Jamie Oliver and this cookbook is another hit for me.

I have also been trying quite a few recipes from some of my favourite foodie youtubers, the guys at Sorted Food.  All four of them are so cute and their videos are hilarious!! I also love their recipes because they are adventurous and interesting, but still use simple ingredients and techniques that I can do at home.  Check them out on their youtube channel or on their website, sortedfood.com


Random Stuff:

Television: I am so sad that the season is over, but my absolute favourite TV show in March was AMC's The Walking Dead.  Zombies are not usually my style, but I am so addicted to all of the characters in this show.  I cant get enough.  I even found all of the comics and read them all!  I am also really loving ABC's Modern Family.  When Suneil and I watch this, we literally end up laughing the entire time!  All of the characters are so funny and endearing and I find the hilarious situations they end up in extremely relate-able.  

People:   I cant seem to stop watching the adorable family vlogs on youtube from Its Judy's life (youtube channel).  They just had twin girls and watching them just reminds me of super happy times when P and D were newborns.  They have another adorable daughter too.  Benji is so funny and Judy is just a real everyday mom.  I enjoy them all so much.

Books: A few weeks ago when I was teaching a grade 8 class I discovered the book Life as We Knew It by Susan Beth Pfeffer.  I began reading it aloud to the students and I got so into it that when I got home I just had to download it for my Kobo.  It is a four book series.  I am on the second book. Each book follows a different character but they all take place at the same time, during a world crisis ... Great page turners, check them out!


Monday, March 17, 2014

Introducing Saskatchemom Can!

My life has seen a lot of changes in the past 3 years.  When my husband and I discovered I was pregnant in 2011, we knew our lives would never be the same.  When we found out we were having twins a few months later, we began to realize just what a turnaround our lifestyle would have to undergo! After 7 years of marriage and nearly 10 years together, we would have to leave behind our carefree DINKS(double income, no kids) lifestyle. Travel, frivolous spending, and lazy weekends in PJs with nothing but the television were things of the past, luxuries we no longer even had time to daydream about. Suneils instinctual reaction to the ultrasound technicians announcement that our fertility treatments may have worked better than we expected was dead on: "I guess we need to buy two cribs ... And we need to get a minivan!"  As I nervously giggled through happy tears, I knew that was only the tip of the iceberg.

The 2 years that followed went like this: 6 months of pretty much constant eating and sleeping, with more than a few doctors appointments, prenatal classes, shopping, preparing our home for two new babies and of course a full time job as a kindergarten teacher thrown in.  Next was a few weeks in hospital on bedrest, followed by ten frightening, heart wrenching, and totally life changing weeks in hospital NICU watching my preemies finish growing into strong healthy babies I could actually take home with me.  Read Suneil's blog Wizardad.blogspot.com for more on that.

The first few months with our babies can best be described as a kind of walking-dead-esqe dance between Suneil and I, and our two sets of parents who provided is with a great deal of help and support.  Though we were all exhausted, somewhat brain dead, emotional, and totally inexperienced in the realm of caring for newborn twins (especially two who had just spent months in hospital with numerous health concerns); we were happy, in love, and confident that we really could get good at this new job: parenthood.  As we knew would happen, things got easier after a few months, and then easier again a few months after that, and before we knew it we had established a new routine, a new family rhythm, a new way of living happily and in love.  

Our boy-girl twins, Pritam and Darshan turned two on January 30th, and after two years with them I feel I am finally getting my bearings, rediscovering my life as more than just their mommy, and looking for something to occupy my "free" time.  Hence this blog, a sort of journal of my successes and struggles as a modern, multitasking woman. I think I have become pretty good at juggling my home-work-family-self balance, and I want to start writing about how I make it all work (sometimes more successfully than others).

I'll be writing about how I feed my family delicious, healthy meals on a budget.  I'll be sharing things I do to keep my kids happy, entertained and growing up healthy. I'll tell you about things I love or hate, like beauty products, fashion, books, TV and other media. Also, how I stay organized, sane and happy even on rough days. And maybe if I'm feeling brave, I'll share some of the mistakes I make along the way and what I learn from them.

Who can do all that? Saskatchemom can! And I'm her so stay posted for more...