What is cheaper and healthier than oats? Nothing!! Oats are so nutritious and delicious and these three recipes are simple and budget friendly. Click on the recipe title to find out more and Enjoy!
Creamy Cinnamon Porridge with Hemp, Sunflower and Pumpkin Seeds
This recipe has been tested until perfect by my father-in-law, Harry. P and D devour it every chance they get and I love having a big batch ready in the fridge for weekday mornings when we are in a rush but need something filling and packed with health benefits.
Homemade Healthy Granola
This is my somewhat famous recipe for granola. It is perfect sprinkled over some Homemade Yogurt, or even with some milk poured over top. Some of the ingredients are not the cheapest, but I buy them in bulk to save money, and I have provided cheaper (though less nutritious) options in the recipe.
Whole wheat and Oat Pancakes with Caramelized Bananas
This recipe is a family treasure. The technique for studding the pancakes with golden caramelized bananas comes from my sister. My dad's pancake recipe has been health-ified with whole grains and healthy fat. Top these with fresh fruit, creamy yogurt and maple syrup and they are to die for.
Thursday, May 29, 2014
Thursday, May 22, 2014
Frugal Friday: Weekend Away
As our twins get older we begin to imagine ways to get away as a family without spending too much money. For the first few years of their lives we stuck pretty close to home. We really only ventured out to fairly predictable locations and we usually took a ton of gear with us. Now that they are growing up and are able to tolerate more of a break from their routine we want a family vacation that is super fun, educational and affordable.
Suneil and I both have fond childhood memories of camping and road-trips with our parents and siblings and we really wanted to recreate some of those memories with our own children. Recently we invested in a camper-trailer to make camping a more convenient experience for us all. When P and D turned two, our opportunity to fly with them for free was over, and since one set of their grandparents live in British Columbia the camper was seemed like a particularly good investment for us as we plan to drive out to BC once a year or so. We have big dreams to take our minivan and camper all over North America with the kids, but this past weekend we took it out for the first time.
We had originally planned on using it for the first time one week later, but we just couldn't wait. For me, one of the biggest draws of a trailer like this was that once we had it all set up and stocked with all the necessities, we would be able to go away for a weekend with little more than a quickly packed suitcase and a few groceries. This turned out to be exactly the case. When I called Suneil at work with the idea that we should forego yard work and go camping for the weekend instead, he thought it was a great idea. twenty-four hours later we were on the road with everything we needed!
We chose a provincial park about 1.5 hours away from home and the weekend cost us under $150. That includes the camp fees, part of our season pass for the parks, and fuel for the van. I didn't count groceries because we would have needed those anyway.
As you know, I am pretty particular about what my kids eat. I avoid preservatives, artificial flavourings, excessive or unnatural sugars and colouring in their foods. However going camping is a whole other situation. Certain long-standing family traditions (from Suneil and I's childhoods) needed to be maintained. Camp foods, for us, include hot dogs, marshmallows, smores, potato chips, and even fruit loops! Some of these things went over better than others. Buns were discarded and hot dogs devoured almost whole, but to my surprise they would not finish their fruit loops. I guess some things really are just too sweet (not for me though! I can still down a bowl of fruit loops once in a while!).
Aside from a few minor issues, the weekend was a great success. The first time hitching the trailer to the van was not 100% successful but after a few pull-overs to make adjustments and then a few more out of sheer paranoia we were finally on our way and made it to the campground without a hitch (well, figuratively if not literally haha). By the end of the weekend we were all pretty exhausted but very happy with how it all turned out. The kids had a blast playing in the dirt, exploring in the brush to find rocks and plants, and seeing wild animals including some crows who had built a nest in our campsite, a pheasant who liked to sleep in a tree beside our camper, and even a few garter snakes!
Our goal of beginning to create happy childhood memories of fun and adventurous family vacations has been reached, and we will continue to gather more and more this summer and in the years to come.
Here are a few fun pictures from our weekend!
.JPG) |
| Snuggling by the campfire |
 |
| Mmmmm ... hotdogs |
 |
| Their first s'mores ... finger licking good! |
Tuesday, May 20, 2014
Frugal Friday: Garden Update
A month has gone by since my last gardening post, so I thought it was time to write an update about how it's all going. As I explained in my previous post, I had planted various seeds in three peat pellet trays and many of them had begun to sprout. I was happily watching and watering them each day and they were coming along nicely. After a few weeks, however, I realized the flaw in my plan. My plants were growing quickly, but unfortunately the weather here in Saskatchewan was not warming up as much as I had hoped. Many of my plants were getting too big for the tiny peat pellets I had started them in, so I had to transplant into larger containers. No big deal right? Except that there are only three windows in my house that really let in enough sunlight to keep plants alive. By the time I had transplanted all of my plants into larger containers, they were everywhere! Every window that got even a little sunlight had a chair or table perched next to it covered in plants. This is not an ideal situation for a family with two curious and sometimes mischievous toddlers wandering around. I kept waiting for the weather to warm up so that I could start hardening the plants off and moving them outdoors, but the weather has remained very windy and quite chilly so far. It was even too cold to leave them in the garage overnight and put them outdoors during the day. Today I finally decided it was warm enough to start, so I rigged up some platforms on the wheelbarrow and the kids wagon so that I could place all of the trays of plants on top and then roll them in and out of the garage quickly and easily. I am praying that in a few weeks time the weather will get more temperate and I will be able to plant into the ground and take it from there. Wish me luck as I attempt to keep numerous plants alive through an unusually cold Saskatchewan spring, in a house that gets very little direct sunlight though the windows.
 |
| My plants grow sideways in an effort to get to the sun ;( |
 |
| Rather than buy pots for transplanting, I took my mom's suggestion of using old fruit containers. They are perfect because many have holes already that are great for drainage. Also, they come with free fruit, haha. |
 |
| I snip the mesh bag off of the pellet and then pop it into the dirt. This lettuce container had no drainage holes, so I used a knife to add some. |
 |
| My easy-roll hardening off mechanism. Quote from P: "Oh NO! Wagon!!" |
Friday, May 9, 2014
Frugal Friday: Eggs for Dinner
One of the ways that I save money is by serving eggs for dinner one
night per week. Eggs are cheap, nutritious, and delicious. There
are a ton of ways that I prepare eggs, and some of our favourite egg dishes are
the basics, like Fried or poached eggs with toast, or omelettes. But
since we made our commitment to eat egg dishes one night a week, I have
discovered all kinds of new recipes that satisfy the whole family, and I've
also dusted off some old family classics too. Many of these dishes are
not meat free. My motivation for cooking eggs as a meal is to save money,
so if I find a great recipe that needs a little ham, I don't turn my nose up at
it. If you're looking for great ways to use eggs, check out one of these ideas!
1.
Avocado and Tomato Omelette
You will need: a loaf of French bread, 1/4 cup of mayonnaise, 100 g sliced deli ham, 2 sliced tomatoes, 1 sliced onion, 10 eggs, salt and pepper, 1 cup shredded cheddar cheese, a long peice of aluminum foil.
I hope you enjoy these egg recipes! Let me know in the comments if you have any favourite egg dishes I need to try!!
1.
Avocado and Tomato Omelette
My favourite omelette is light and fresh and so quick and simple to
make. I whisk the eggs with some chopped chives, salt and pepper, then
cook them in batches to make individual servings (2-3 eggs at a time). In a
medium frying pan over medium heat, melt a little butter and then pour in one
serving of eggs. Swirl the pan around a bit to coat the bottom. The
aim is to make a fairly thin omelette that can be filled and rolled up.
After a few minutes the omelette should start to set on the top. I use my
spoon or spatula to spread out the raw bits and help the omelette cook evenly.
If you need to, you can pop it under the broiler for a minute to set the
top. Next, in the centre of the omelette place some sliced tomatoes and avocados. Season them with salt and
pepper, then top that with a dollop of sour cream. Roll the
sides of the omelette over the filling, slide it onto a plate, drizzle it with balsamic vinegar (the best you can afford - I love the
Presidents Choice Splendido four leaf quality), and serve with a slice of
buttered toast.
2. Potato Frittata
I love this recipe because the ingredients are as cheap as it gets, but
the result is still delicious and beautiful. Start with a few potatoes. You can bake them, steam them or microwave them. I usually
use the microwave, using a fork to poke some steam holes all around the outside
of the potato, then placing them in a dish with a lid and cooking for 6-8
minutes, turning and checking them every 3 minutes or so until they are fork
tender. You don't want them mushy, just tender but firm. Let them
cool but DON'T put them in the refrigerator. This will make them dry and
grainy. Once they are cool remove the peels, cut them lengthways into
quarters and then slice them about 1 cm thick. Preheat your oven to 375 F
and heat a heavy fry pan over medium heat. Add a little olive oil and
butter and then place the potatoes in the pan in one layer. You want them
to crisp up and get brown, so don't move them around too much. Just keep
your eye on them but let the pan do the work while you chop a small onion and whisk up 8-10 eggs with some salt and pepper and chopped parsley. Once the potatoes have started to brown, turn them over to brown
the other side. After a few minutes, add the onion and allow it to cook a
few minutes until its soft and translucent. Once the potatoes are good
and brown, and the onions are soft, add the eggs. Pour them all into the pan at
once, and stir with a wooden spoon until they begin to get curdled and stiff.
When they are about half way cooked, stop stirring and smooth the top of
the frittata, then pop it into the oven for 10 minutes, or until the middle of
the frittata is set. If you want, you can sprinkle some Gruyere or Cheddar cheese over the top for the
last 5 minutes. Serve with a green salad.
3. Egg Casserole
This dish is wonderful because it is so versatile. You can
literally stir in whatever leftovers you happen to have in the fridge, bake it
up, and call it dinner. Your family might not even recognize that it is
leftovers (Especially if the leftovers are from a few different nights, a few
days ago, stirred together to become unrecognizable!) Start by sauteeing a chopped onion in a little oil or butter until it is
soft. Next, whisk together 8 eggs, 2 cups of
milk, and 1 cup of shredded cheese (use whatever you
like or have). Once the onions have cooled a little, stir them into the
egg mixture too. Cut some bread into cubes. You can use any bread
product you have around, and it is better if its a little dry and stale.
You need enough to cover the bottom of a 9 x 11 inch baking dish, so 6-8
slices of sandwich bread, or an equivalent amount of cubed baguette, hamburger
buns, leftover toast ... you get the idea. Grease the baking dish and
place the bread in the bottom. Next, add your leftovers, about 2 cups
total. Really, anything goes, but here are a few good combos:
- Diced ham, some cooked
veggies (asparagus, broccoli, spinach, corn ... whatever), cheddar cheese
- Chopped Italian or farmer's
sausage, cooked mushrooms and bell peppers, feta cheese
- Leftover chow mein or fried
rice, leftover chop suey or other stir fry (be sure to drain off the liquid
and pat the veggies dry). I would leave out the cheese in this one.
- Diced chicken, black beans,
some salsa, and monterey jack or cheddar cheese
This stuff is better if you make it in the morning, then pop it in the
fridge all day so the bread can soak up all the eggy liguid. When you're
ready, preheat the oven to 350 F, place the casserole in and cook for about an
hour, or until it is set in the middle, and starting to brown on top.
4. Tomatillo Salsa Poached Eggs
This recipe is so easy! Simply pour your tomatillo salsa (check
out my sister's fantastic recipe here) into a frying pan and heat over medium
heat until it comes to a simmer. If it is a little too thick, thin it out with some chicken stock or water. Crack in some eggs, cover and cook 3-6
minutes, or until they are done to your liking. I like the eggs still
runny so that I can break them, let them run into the salsa, and then soak up
every bit of it with a warm tortilla. Yum!!
5. Eggstravaganza
This is an old family classic my mom used to make when i was a kid. It is super fast and easy to put put together. The ingredients are nothing special or surprising, but the end result is so good. It is definitely a case of the whole being greater than the sum of its parts:
You will need: a loaf of French bread, 1/4 cup of mayonnaise, 100 g sliced deli ham, 2 sliced tomatoes, 1 sliced onion, 10 eggs, salt and pepper, 1 cup shredded cheddar cheese, a long peice of aluminum foil.
- In a medium frying pan, cook the onions in some oil or butter until they are soft, but not becoming brown. Remove them from the pan and set aside. Preheat your oven to 350 F.
- Assemble your sandwich. Cut the top off of the French loaf, and pull out most of the soft bread from the inside of the loaf, creating an empty well to fill up. (Tip: I put these bits of bread in a freezer bag and freeze them. Then, when I want to make an egg casserole, I pull them out, toast them up a bit in the oven to dry them out, then use them as my bread component!)
- Spread the mayonnaise all over the inside of the emptied loaf, as well as on the under side of the top of the loaf that you cut off. Next, line the inside with the slices of ham, and then add the sliced tomatoes and cooked onions.
- Break the eggs into a large bowl, then whisk them up with some salt and pepper. Heat the same pan you used for the onions on medium heat. Put the eggs into the warm pan and stir and scramble them until large curds form and the eggs are almost cooked. Do not cook them all the way as they will finish in the oven. When they are no longer runny but still need a little cooking, add them into the emptied loaf on top of the tomatoes and onions.
- Sprinkle the cheese on top of the eggs, and place the top onto the loaf. Wrap the whole thing up tightly with aluminum foil. Place on a cookie sheet and pop into the oven for 15-20 minutes.
- Remove from the oven and unwrap the aluminum foil. Let the sandwich sit for 5 minutes before slicing and serving.
I hope you enjoy these egg recipes! Let me know in the comments if you have any favourite egg dishes I need to try!!
Tuesday, May 6, 2014
April favourites
Here are my favourite things from the month of April!


Hair: I was hooked in by the bright orange packaging on the Herbal Essences Body Envy dry shampoo, and it's also one third the price of my old favourite, Batiste brand. I like the Herbal Essences one for a day when I am wearing my hair half up or in a ponytail, because it it gives me great texture and volume. I can pull my hair back and pin it or tie it and it always has a perfect bump of volume on top and smoothes out easily. I also like that it soaks up all the oil but it doesn't turn my hair white (at least, not once I rub it in), and it gives me quite a bit of hold as well. For a non-washing day when I want to wear my hair down and have it feel really clean and soft, I will still use my Batiste because the herbal essences one leaves my hair quite stiff.
Books: I am somewhat ashamed to admit that due to my insatiable addiction to Downton Abbey, I have read only a portion of just one book this month. I am just halfway through Markus Zusak's The Book Thief and I am really enjoying the story about a young girl growing up in Nazi Germany. Sounds like it's been done before, but the story is very original, written from the point of view of the Grimm reaper. A definite page turner, even after you've just finished an emotionally exhausting marathon (of television watching).

Beauty:
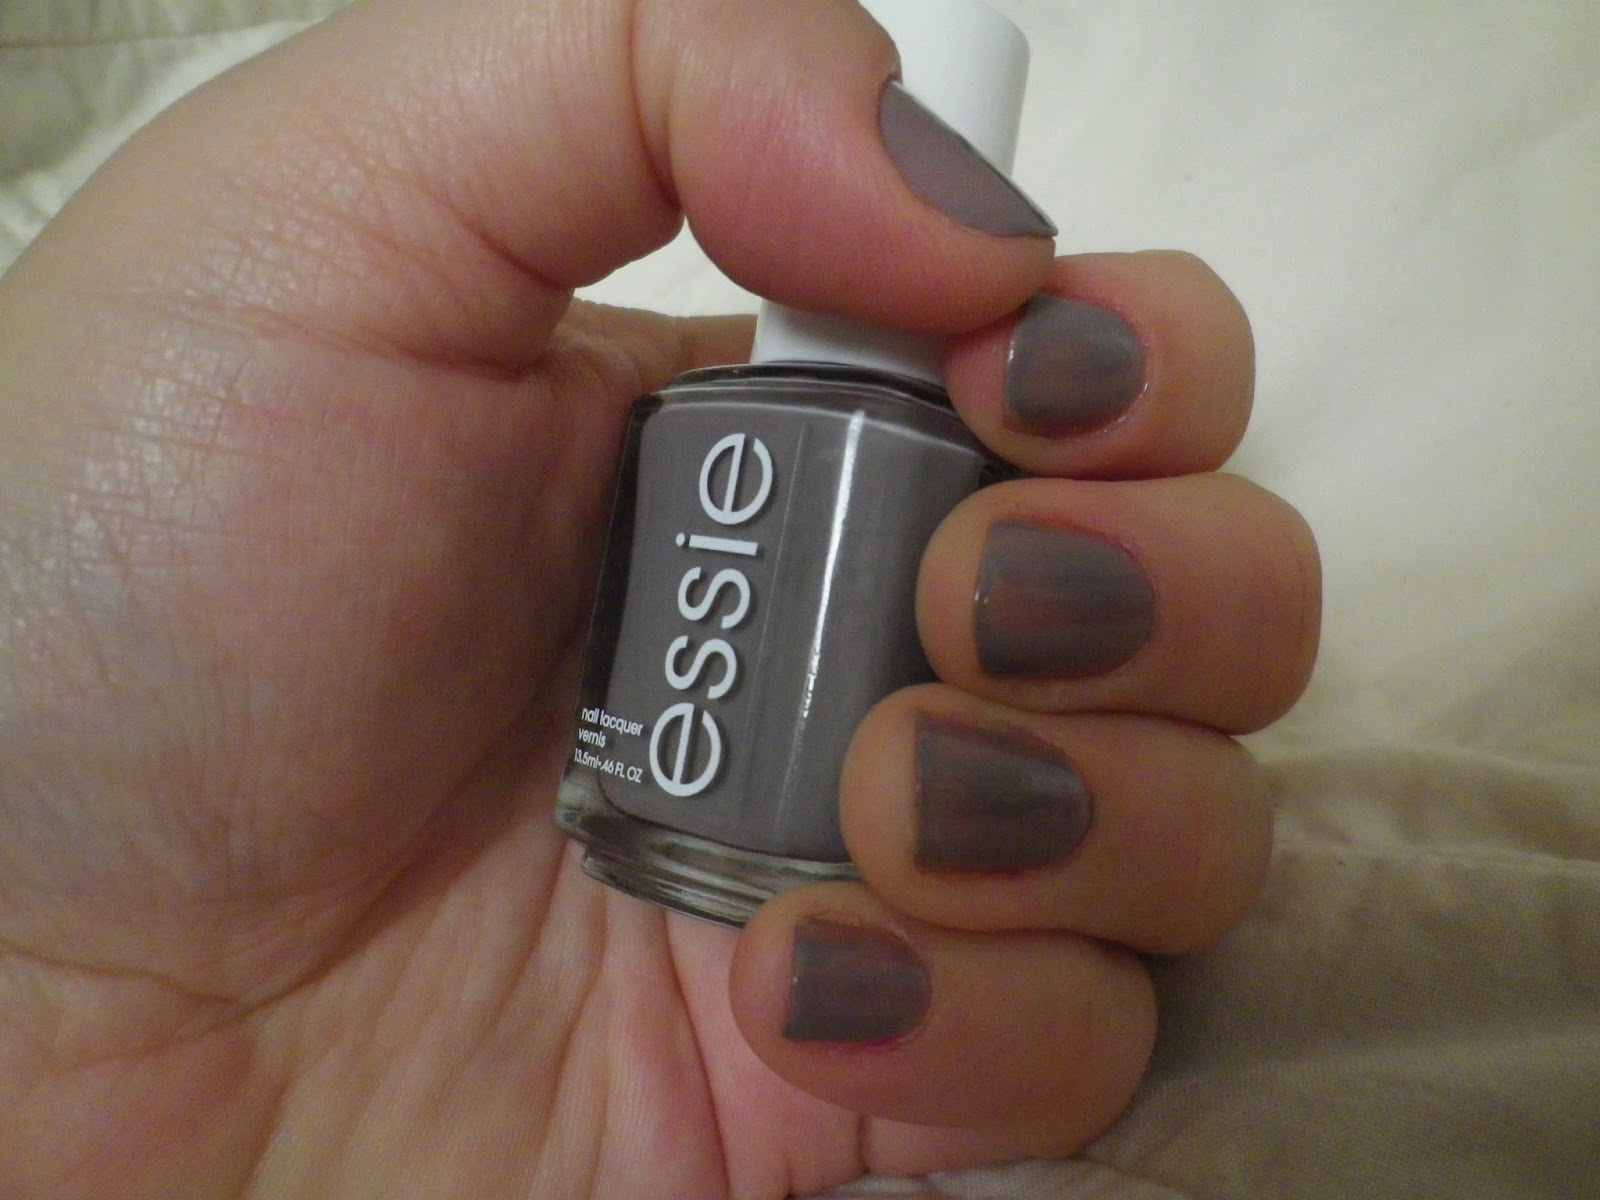
Nails: I have really been enjoying my Milani nail lacquer. It claims to be a high speed, fast dry, one coat formula. These really are a very fast drying formula and one coat usually does the trick, which I love because I usually want to be able to do my nails in 15 minutes or less. I don't use a topcoat (takes too long!) but I usually get a at least a few days out of a manicure with this stuff even though I am cooking, cleaning and gardening a lot. The colour selection is bright, vibrant and perfect for spring and summer. I have the colours Pink Express and Jiffy Orange.
Makeup: My hands down favourite makeup purchase this month is from Tarte Cosmetics. The Brow Architect is a brow shaper, liner and definer. One end is a brow pencil, but instead of coming to a point, it comes to a flat tip, much like the shape of the tip of a pair of tweezers. The other end has a spoolie, and then in the middle is a neat little compartment that contains a concealer/highlighter with a sponge applicator tip. I use this product along with my NYX brow powder, and my brows have never looked better or more natural. I have the colour Fair.
Hair: I was hooked in by the bright orange packaging on the Herbal Essences Body Envy dry shampoo, and it's also one third the price of my old favourite, Batiste brand. I like the Herbal Essences one for a day when I am wearing my hair half up or in a ponytail, because it it gives me great texture and volume. I can pull my hair back and pin it or tie it and it always has a perfect bump of volume on top and smoothes out easily. I also like that it soaks up all the oil but it doesn't turn my hair white (at least, not once I rub it in), and it gives me quite a bit of hold as well. For a non-washing day when I want to wear my hair down and have it feel really clean and soft, I will still use my Batiste because the herbal essences one leaves my hair quite stiff.
Parenting:
Colgate children's electric toothbrushes: So about a year ago the public health nurse suggested I try electric toothbrushes for P and D. And then she gave me some free toothbrushes. Being the frugal Saskatchemom that I am, I did not run out and pay money for more toothbrushes. It took me until this month to finally check out the options in children's electric toothbrushes, and to my surprise there were a ton! I choose a few that came with stickers for decorating and P and D were hooked as soon as they heard that word "stickers". They love using these toothbrushes, and now it is them who remind us it's time for teeth cleaning! It also makes the job quicker and much less work for us.Food:
Youtube: I have been loving youtube channel Food Wishes this month. Host Chef Jon Inspires me to try and make things I would never imagine I could do at home (like baguette at Easter, or pita bread! Who knew such things were possible for a simple home cook!?! ... he did I guess). His videos lay out complicated recipes into simple to follow instructions, with every detail outlined so that if you follow his guide, the recipe is pretty much foolproof. I love this guy and he really cracks me up too.
Snack: At costco a few weeks ago I picked up a box of Calbee Snap Pea Crisps. While I was reading the label and being pretty impressed with the common list of ingredients and acceptable-to-me nutritious value, a random woman told me I had to try them because they are delicious. So I did, and they are. P and D like them too.
Random Stuff:
Television: Suneil and I have really been enjoying Big Brother Canada. I am rooting for Neda by the way! but our true addiction this month has been BBC's Downton Abbey, a period drama about a wealthy family adapting through troubled and changing times. We got our hands on all four seasons, and two weeks later we had watched it all. I know it's crazy. How can the busy parents of two year old twins possibly find the time to watch quite so much TV??? I promise our children were not neglected, but I did neglect all of my other favourite pastimes in favour of watching this show. It has the ability to make me laugh out loud and sob uncontrollably, sometimes in the same episode!Books: I am somewhat ashamed to admit that due to my insatiable addiction to Downton Abbey, I have read only a portion of just one book this month. I am just halfway through Markus Zusak's The Book Thief and I am really enjoying the story about a young girl growing up in Nazi Germany. Sounds like it's been done before, but the story is very original, written from the point of view of the Grimm reaper. A definite page turner, even after you've just finished an emotionally exhausting marathon (of television watching).
People: This month my favourite people are a little more personal for me. A few weeks ago something shocking and terrifying happened to one of my siblings. With my parents out if the country, it was up to myself and my other siblings to deal with everything that needed to be done and to support each other emotionally with the usual leaders of our family absent. My fave people this month are my in-laws, who seemed to save the day over and over. My sister-in-law was a rock, providing moral support, much needed information, a listening ear and babysitting whenever she was needed. My (future) brother in law silently took care of all the tasks that no one else had the time or motivation to do. So many times I remembered something I should get done, only to find he had already taken care of it. My husbands parents arrived early this week and provided all kinds of support, providing a less chaotic and much more upbeat environment for P and D, supporting everyone in my family with heartfelt concern, and helping out with daily tasks wherever they were able. These people are all so very dear to me and I had to give them props this month.
Hope you enjoyed this random list of goodies! Happy May!
Thursday, May 1, 2014
Frugal Friday: Making Yogurt
My family eats a TON of yogurt, and making it myself saves me money. I learned the technique from my mother and father in law. It takes a bit of practise and a bit of time but it is not labour intensive. You need just 3 ingredients, a few key kitchen tools and some patience. Here I will outline the steps and directions for making your own yogurt, as well as a few big mistakes to avoid. We like Greek style yogurt, which is much more expensive than milk. But since I can turn a lot of milk into yogurt using just a bit of supermarket yogurt, it is very economical to make it myself. It is also extremely delicious!

What you will need:
Ingredients:
- Fresh milk : I use whole milk but any milk will work: 2%, 1% or skim. The amount of yogurt you want determines the amount of milk you use. I make 4 litres at a time because it keeps in the fridge for a few weeks, but you could make as little or as much as you like.
- Powdered Milk: 1/2 cup per litre (4 cups) of milk
- Plain (unflavoured and unsweetened) yogurt: a heaping tablespoon full per litre of milk. This is what is called your starter. When your milk is at the correct temperature, the bacteria from the existing yogurt spreads and turns all of it into yogurt! I use the Kirkland brand 0% plain Greek yogurt from Costco. If you can't get your hands on this then you will have to test different brands to find one you really like. I suggest finding one that has no gelatin or guar gum. Look for a list of ingredients that includes only milk and bacterial cultures, nothing else. The flavour and texture of your yogurt will mimic the starter, so choose a yogurt with a consistency and level of acidity that you like. Once you make your yogurt, then you can save a bit and use it as a starter for the next batch. I usually buy a fresh starter every second time I make it.
Tools:
- a heavy saucepan or dutch oven
- a whisk
- a thermometer
- a wire/mesh strainer
- a small insulated cooler lined with a thick towel (like a bath towel)
Directions:
- Remove the yogurt starter from the fridge. It needs to be at room temperature when you stir it into the warm milk. Stirring it in while it is cold could ruin your yogurt.
- In a large heavy bottom saucepan or dutch oven, combine the milk and the powdered milk, stirring with a whisk until the powder dissolves. I use powdered milk for two reasons. The first is that I like to enrich my yogurt for my children. Adding powdered milk increases the amount of calcium, vitamin D and protein in my yogurt. It also helps to create a rich, thick and creamy consistency. When I use this method, my yogurt always sets perfectly and tastes delicious. Since our favourite is Greek yogurt, this method gives my homemade yogurt that same thick and creamy texture.
- Heat the milk over medium heat. The time this takes will depend how much milk you are heating, but there are a few signs to watch for so that you will know when it is ready. You do not want the milk to boil, just come to the point where it is about to simmer. The milk will begin to get frothy when it is almost ready. I use a large spoon to push the foam out of the way (no need to remove it) and watch for tiny bubbles raising to the top of the pan. Once you see those bubbles, the milk is warm enough. I don't use my thermometer for this step, but if you choose to use it, the temperature you are aiming for is 198-200 F. If your milk does come to a boil, it is not the end of the world. It will just take longer to cool down to the right temperature, and it may make a huge mess on your stove. Keep your eye on it!
- Remove the milk from the stove and set it aside to cool. Again, the time this takes will depend on the volume of milk. This is where your thermometer comes in. You are aiming for 45-55 C, or 115-125 F. I usually check it every 10 minutes until it gets close to the right temperature, then every five minutes. If I am distracted or trying to do a few things at once, I set my timer so I will not forget and come back to find cold milk and have to start again.
- Stir in the yogurt starter. Once the milk comes to temperature, use a whisk to stir in the ROOM TEMPERATURE yogurt. Find some lidded containers for your yogurt. Make sure that they will fit inside of your cooler.
- Strain the yogurt and leave it to set. I like to place the containers in my sink to avoid a mess. Place the sieve on top of the container and pour the yogurt through the sieve and into the container. Put the lids on the containers and place them into the cooler. Tuck the towel all around them and then close the cooler and set it somewhere that it will not be disturbed. Set a timer for 8 hours and walk away! Try not to move the cooler for at least a few hours after you close it, and don't open it until the eight hours are up. The yogurt needs to stay at that same warm temperature in order for the bacterial cultures to grow and set the yogurt. I don't like my yogurt too tangy, but if you do like tangy yogurt, you can let it set for up to 12 hours. I have even forgotten to set a timer and realized after 16 hours that my yogurt was still waiting. It still worked out fine. The longer you leave it, the thicker and tangier it will become.
- Place yogurt in the fridge. Once your yogurt is as thick and tangy as you want it, place it in the fridge to cool overnight. Once it is cold, enjoy it however you like! Our favourite way is drizzled with maple syrup and sprinkled with hemp seeds. Breakfast of champions!! (Or at least future champions ... of something that is yet to be determined)
Subscribe to:
Posts (Atom)